#excel convert rows into columns
Explore tagged Tumblr posts
Visit Tumblr Blog
Explore Tumblr blogs with no restrictions, modern design and the best experience.
Last Seen Tumblr Blogs


Fun Fact
In February 2021, Tumblr had 518.6 million blog accounts.
Text
Converting Rows to Columns in Excel - Transpose Rows into Columns
Unlock the power of data manipulation in Excel with our excellent guide on converting rows to columns in excel. Learn convert columns to rows, change row to column.

Switching Lines over completely to Segments in Succeed excel convert rows into columns
Welcome to this blog entry, where we'll zero in on "Changing Lines over completely to Sections in Succeed," a fundamental ability for information control and examination. Succeed's strong elements empower consistent change among lines and sections, giving a flexible method for sorting out and break down information. We'll investigate different techniques, including "convert sections to push in Succeed" and "render line into segment Succeed," to enhance your information control. We should make a plunge and figure out how to "convert segments to lines in Succeed with recipes" to capitalize on your information. We should get everything rolling!
Chapter by chapter guide
1. Presentation
2. Understanding Lines and Sections in Succeed
3. Switching Lines over completely to Segments Utilizing Translate
4. Utilizing Glue Exceptional to Switch Lines over completely to Segments
5. Changing Lines over completely to Sections with Recipes
6. Convert Sections to Lines in Succeed
7. Changing Lines to Segments Utilizing Power Question
8. Succeed Convert Line to Section: A Bit by bit Guide
9. Succeed Convert Segment to Line: A Bit by bit Guide
10. Switching Lines over completely to Sections: Best Practices
11. Succeed Information Investigation with Rendered Information
12. Investigating Normal Issues
13. Progressed Succeed Tips and Deceives
14. End
1. Presentation
Microsoft Succeed is broadly utilized for information the executives and investigation. One of its essential undertakings is switching lines over completely to sections as well as the other way around. In this article, we will zero in on switching lines over completely to segments and investigate different procedures to productively achieve this.
2. Understanding Lines and Segments in Succeed
Before we jump into the change techniques, we should accept the idea of lines and segments in Succeed. Succeed exercise manuals comprise of cells coordinated in lines and sections. Each line is recognized by a number, while every section is signified by a letter. Lines are level, and sections are vertical. This design is crucial for information portrayal and investigation.
3. Changing Lines over completely to Sections Utilizing Translate
The "Render" highlight in Succeed permits you to switch lines over completely to segments as well as the other way around. It is a speedy and clear strategy to switch the direction of your information. To utilize this element, follow these means:
Select the scope of cells containing the information you need to translate.
Right-click on the chose range and pick "Duplicate."
Right-click on the cell where you believe that the translated information should begin.
Click on the "Translate" choice under the "Glue Choices."
4. Utilizing Glue Extraordinary to Switch Lines over completely to Sections
One more method for switching lines over completely to segments is by utilizing the "Glue Exceptional" include. This strategy gives you more command over the glue activity. This is the way you can make it happen:
Select the scope of cells you need to change over.
Right-click and pick "Duplicate."
Select the objective where you maintain that the information should show up.
Right-click, pick "Glue Extraordinary," and afterward select "Render."
To figure out how to separate numbers from a string in Succeed, look at our far reaching guide on Extricating Numbers from String in Succeed.
5. Changing Lines over completely to Sections with Equations
Succeed gives different recipes to assist you with changing lines over completely to segments. One well known recipe for this assignment is the "List" and "MATCH" blend. To utilize this equation:
Make another unfilled reach to hold the translated information.
In the primary cell of the new reach, enter the accompanying equation:
See More Info :- https://futuretechhub.in/converting-rows-to-columns-in-excel/
0 notes
Text
How I track how much I spend on languages
I've been tracking how much time I spend on languages since june 2018 and I've been doing yearly summaries here every for a couple of years now. This year I was asked by @lokinescence and @itsbulbulls to explain a bit more how I track my time. I don't know if I'll be able to explain it clearly but I'll try! Maybe it's a bit chaotic, it surely isn't tidy or pretty.
I know there are different apps you can use to log your time but I started doing this in excel and I just like how I can play with it and add/delete what I need.
How do I know how much time I spent on an activity? Basically every time I do something in my languages, I write the time down. Easy. If I'm on my computer, into the excel sheet, if I'm on my phone, into my notes app. Now, the times aren't always precise. If I'm watching a show, they aren't talking the whole time and I try to approximate the "pure time" I spent with the languages. Which means I just substract a couple of minutes from how long the episode is. If I want to read or work with my textbook or do something longer, I'll write the start time in my notes app and when I finish, I just count how many minutes I spent doing the activity. Sometimes I don't know the time exactly – like if I'm texting with someone while doing something else – and I just guess how much time it could have been. Tracking the time isn't 100% precise, it's just so that I can roughly know, and if I miss some time here or there, it's fine.
How does my excel sheet look like? (messy) This is my daily page:

Firstly, I have these tables for each of my languages. It's a table where I log my time every day for the whole month. There are five rows for weeks in a month and the sixth row sums up how much time I spend on a particular day. If you look at my Swedish table you can see I tend to spend the most time on Swedish on Sundays (the last column). It's not that useful but I wanted to track that in 2018 and haven't really changed it. Then in the bottom right corner you can see the minutes converted to hours. For example, so far I've spent almost 7 hours doing Swedish in January. At the end of each month I put my data in my second page, delete the numbers in the tables and start over.
On the second page I have my monthly and yearly data. First I have a yearly table that also gets deleted at the end of the year. I log in how much I spent on each language in each month and can see the sum of how much I spent on each language during the whole year.

And then I have another table where I log the total time spent on languages each month. So if I spent 10 hours on each of my languages, I log 30 for January. This table doesn't get whiped, the numbers stay and I can see how much I did each month dating back to 2018.

And my last table (I'm showing just the first row, 2019, for some reason I feel self-conscious about posting all my stats here) shows how much time I spent on each language in a particular year and how many hours it's in total.

That's it, I guess! I hope someone finds it helpful
11 notes
·
View notes
Text
What is Structured Data and Why Do Lists Need It?
Structured data refers to information organized in a clearly defined format, such as tables with rows and columns. This structure allows software systems and users to efficiently search, analyze, and manipulate data. In contrast, a simple list—whether it's a bullet-pointed list in a document or a string of values—is not inherently useful without structure. For example, a list of names and phone numbers is just text until it’s divided into two columns labeled “Name” and “Phone Number.” This conversion gives meaning and order to the information, making it readable for both humans and machines. Lists are useful for brainstorming, capturing quick notes, or collecting raw input—but structured data unlocks their full potential.
Step-by-Step: Converting Lists to Tables in Excel and Google Sheets
One of the easiest ways to structure a list is by using spreadsheet tools like Excel or Google Sheets. Start by pasting your list into a column. If each item includes multiple parts (e.g., “John Doe, New York, 32”), you can use Excel’s “Text to Columns” feature or Google Sheets’ SPLIT() function. These tools allow you to divide each entry into multiple columns using whatsapp data like commas, tabs, or spaces. After splitting, you can add headers to each column to define your dataset (e.g., Name, City, Age). This small step transforms your raw list into an organized data table. From here, you can sort, filter, and even create charts.

Using Online Tools to Convert Lists Automatically
There are many free online tools designed specifically to convert lists into structured formats such as CSV or JSON. These include platforms like CSVLint, TableConvert, or ConvertCSV.com. Simply paste your list, select your delimiter, and the tool instantly formats your input into a data table. Some tools even let you preview your data before downloading. These web-based utilities are perfect for users without spreadsheet software or coding experience. They’re especially handy for quick jobs like formatting data for reports, email campaigns, or import into databases or CMS platforms.
Tips for Clean and Accurate Data Transformation
Successful list-to-data conversion depends on consistency. Always check that each list item follows the same structure—no missing commas, extra spaces, or inconsistent formatting. Use functions like TRIM() in Google Sheets to remove unwanted spaces, or CLEAN() to get rid of hidden characters. Standardize formats for dates, phone numbers, or capitalization. If working with large lists, apply conditional formatting to highlight errors. Finally, always validate your converted data before using it—whether for analysis, uploads, or automations. Clean data is reliable data, and a little attention early on saves time down the line.
0 notes
Text
A Thorough Manual for Addressing Common Excel Mistakes
For everyday computations, financial modeling and data analysis, Microsoft Excel is a powerhouse. Still, even experienced users can run into annoying mistake notices halting advancement. Knowing these mistakes, their origins, and how to fix them will help you save time and headaches. We will delve in this guide on the most often occurring Excel problems, their causes and workable corrective solutions. This article will guide you with surety around Excel's quirks whether you are a professional or just starting.
1. #DIV/0! Error: Division by Zero
The #DIV/0! error appears when a formula attempts to divide a number by zero or an empty cell. Excel cannot process division by zero, as it’s mathematically undefined.
Why It Happens
A formula like =A1/B1 where B1 is zero or blank.
Referencing a cell with no value in the denominator.
Using functions like AVERAGE on a range with no valid numeric data.
How to Fix It
Check the Denominator: Ensure the cell in the denominator (e.g., B1) contains a non-zero value. If it’s blank, you might need to input a value or adjust your data.
Use IFERROR: Wrap your formula in IFERROR to handle the error gracefully. For example: =IFERROR(A1/B1, "Not Divisible") returns "Not Divisible" instead of the error.
Use IF to Avoid Zero: Use =IF(B1=0, "Not Divisible", A1/B1) to check if the denominator is zero before performing the division.
Pro Tip
To prevent this error across a large dataset, use conditional formatting to highlight cells with zero values in the denominator, making them easier to spot.
2. #VALUE! Error: Invalid Data Type
The #VALUE! error occurs when Excel encounters an invalid data type in a formula, such as text where a number is expected.
Why It Happens
Performing calculations with cells containing text (e.g., =A1+B1 where A1 contains "text").
Incorrect arguments in functions, like using a text string in a mathematical function.
Hidden spaces or non-numeric characters in cells that look like numbers.
How to Fix It
Verify Data Types: Check the cells referenced in the formula. Use ISNUMBER(A1) to confirm if a cell contains a number.
Clean Data: Remove hidden spaces or characters using the TRIM or CLEAN functions. For example, =TRIM(A1) removes leading/trailing spaces.
Convert Text to Numbers: If numbers are stored as text, select the cells, click the error indicator (yellow diamond), and choose “Convert to Number.”
Pro Tip
Use the VALUE function to convert text that looks like a number into an actual number: =VALUE(A1).
3. #REF! Error: Invalid Cell Reference
The #REF! error indicates that a formula refers to a cell that is no longer valid, often due to deleted rows, columns, or worksheets.
Why It Happens
Deleting a cell, row, or column referenced in a formula.
Moving or copying a formula to a location where referenced cells don’t exist.
Referencing a closed workbook or a moved external file.
How to Fix It
Check References: Review the formula to identify missing references. Excel’s formula auditing tools (Trace Precedents/Dependents) can help.
Undo Deletions: If you recently deleted cells, use Ctrl+Z to undo the action and restore the reference.
Update Links: If the error stems from an external workbook, ensure the linked file is accessible or update the reference path.
Pro Tip
Before deleting rows or columns, check if they’re referenced in formulas using the “Find & Select” tool to search for cell references.
4. #NAME? Error: Unrecognized Text in a Formula
The #NAME? error appears when Excel doesn’t recognize text in a formula, often due to typos or missing add-ins.
Why It Happens
Misspelling a function name (e.g., =SUMM(A1:A10) instead of =SUM(A1:A10)).
Using a named range that doesn’t exist.
Referencing a function from an add-in that isn’t enabled (e.g., Analysis ToolPak).
How to Fix It
Check Spelling: Double-check function names and ensure they’re correct. Excel’s formula autofill can help avoid typos.
Verify Named Ranges: Go to Formulas > Name Manager to confirm the named range exists and is correctly defined.
Enable Add-ins: If using specialized functions, ensure the relevant add-in is enabled via File > Options > Add-ins.
Pro Tip
Use Excel’s Formula AutoComplete feature to select functions and avoid spelling errors.
5. #N/A Error: Value Not Available
The #N/A error typically occurs in lookup functions like VLOOKUP or INDEX/MATCH when the searched value isn’t found.
Why It Happens
The lookup value doesn’t exist in the source data.
Mismatched data types (e.g., text vs. number) in the lookup column.
Incorrect range references in lookup formulas.
How to Fix It
Verify Lookup Value: Ensure the value you’re searching for exists in the lookup range.
Check Data Consistency: Ensure the lookup value and source data have the same format (e.g., both are numbers or text).
Use IFERROR: Wrap the formula in IFERROR to display a custom message, like =IFERROR(VLOOKUP(A1, B1:C10, 2, FALSE), "Not Found").
Pro Tip
Use MATCH to test if the lookup value exists in the range before running the full formula.
6. #NUM! Error: Invalid Numeric Values
The #NUM! error appears when a formula contains invalid numeric values, such as calculations that exceed Excel’s limits.
Why It Happens
Calculations producing numbers too large or too small for Excel to handle.
Invalid arguments in functions like SQRT (e.g., =SQRT(-1)).
Iterative calculations failing to converge.
How to Fix It
Check Formula Inputs: Ensure inputs are within acceptable ranges. For example, use ABS to avoid negative numbers in SQRT.
Adjust Iteration Settings: If using iterative calculations, go to File > Options > Formulas and adjust the maximum iterations or change limit.
Simplify Formulas: Break complex calculations into smaller steps to identify the problematic part.
Pro Tip
Use IF to validate inputs before performing calculations, like =IF(A1>=0, SQRT(A1), "Invalid Input").
7. #NULL! Error: Invalid Range Intersection
The #NULL! error is rare and occurs when a formula specifies an invalid intersection of ranges.
Why It Happens
Using a space instead of a comma or colon in a formula (e.g., =SUM(A1 A10) instead of =SUM(A1:A10)).
Incorrectly referencing multiple ranges that don’t intersect.
How to Fix It
Check Syntax: Ensure you’re using the correct operator (: for ranges, , for separate arguments).
Review Range References: Confirm that referenced ranges intersect or are correctly defined.
Pro Tip
Use Excel’s formula bar to carefully review syntax, as small typos can trigger this error.
8. General Troubleshooting Tips
Beyond specific error fixes, here are some universal strategies to prevent and resolve Excel errors:
Use Formula Auditing Tools: Found under the Formulas tab, tools like Trace Precedents and Evaluate Formula can pinpoint error sources.
Validate Data: Use Data Validation to restrict cell inputs to specific types, reducing errors like #VALUE!.
Keep Backups: Save a copy of your workbook before making major changes to avoid losing data due to #REF! errors.
Update Excel: Ensure you’re using the latest version of Excel, as updates often fix bugs and improve error handling.
Conclusion
Excel errors can be daunting, but they’re often straightforward to resolve once you understand their causes. By systematically checking formulas, data types, and references, you can quickly get back to your work. Bookmark this guide for the next time an error pops up, and you’ll be solving issues like a pro in no time. Have a specific Excel error you’re struggling with? Drop a comment below, and let’s troubleshoot it together!
0 notes
Text
data cleansing
🧹 Common Data Cleansing Tasks ChatGPT Can Handle
ChatGPT is capable of assisting with various data cleaning operations, including:
Standardizing text formats: Converting text to a consistent case (e.g., all uppercase or lowercase).
Correcting inconsistent entries: Aligning variations of similar entries (e.g., "NY" vs. "New York").
Handling missing values: Identifying and filling in missing data points.
Removing duplicates: Detecting and eliminating duplicate records.
Parsing and formatting dates: Ensuring date fields follow a consistent format.
Flattening nested data structures: Transforming complex data into a flat, tabular format.
Validating data entries: Checking for and correcting invalid data entries.robertorocha.infoPackt
For instance, in a dataset containing employee information, ChatGPT can standardize inconsistent name formats and unify various date formats for joining dates. KDnuggets+2Packt+2robertorocha.info+2
🛠️ How to Use ChatGPT for Data Cleaning
To utilize ChatGPT for data cleaning, follow these steps:tirabassi.com
Prepare Your Dataset: Ensure your data is in a structured format, such as CSV or Excel.
Upload the File: In ChatGPT, click the "+" icon to upload your dataset.
Describe the Cleaning Task: Clearly specify what cleaning operations you want to perform. For example:https://data-finder.co.uk/service/data-cleansing/
"Please standardize the 'Employee Name' column to title case and convert the 'Joining Date' column to the YYYY-MM-DD format."
Review and Execute: ChatGPT will generate and execute Python code to perform the specified cleaning tasks, providing you with the cleaned dataset.Medium+2OpenAI+2Packt+2
This approach is particularly beneficial for users without extensive coding experience, as ChatGPT handles the scripting and execution of data cleaning operations. Medium+3OpenAI+3StatsAmerica+3
⚠️ Considerations and Limitations
While ChatGPT offers significant advantages in data cleaning, be mindful of the following:
Accuracy: ChatGPT performs best with well-defined tasks. Ambiguous instructions may lead to suboptimal results.
Data Sensitivity: Avoid uploading confidential or sensitive data, especially when using non-enterprise versions of ChatGPT.
Scalability: For very large datasets (e.g., millions of rows), consider breaking the data into smaller chunks or using specialized data processing tools. OpenAI Community
📚 Additional Resources
For a visual guide on using ChatGPT for data cleaning, you might find this tutorial helpful:
Feel free to share a sample of your dataset or describe your specific data cleaning
1 note
·
View note
Text
Excel Power Query vs. Power Pivot: Which Tool Should You Use?

If you’ve ever worked with large datasets in Excel, you’ve probably reached a point where basic formulas just aren’t enough. That’s where two of Excel’s most powerful features come in: Power Query and Power Pivot. Both tools are essential for data analysis, but they serve different purposes.
So how do you decide which one to use? In this guide, we’ll walk through the differences between them and help you figure out the right tool for your needs.
What Is Power Query in Excel?
Power Query in Excel is a tool designed to clean, transform, and prepare data for analysis. It allows you to import data from different sources, fix formatting issues, and shape the data exactly how you want it, all without changing the original files.
Key Benefits of Power Query:
Connects to many sources: Excel files, text files, databases, online sources, and more.
Cleans data efficiently: You can remove duplicates, split columns, filter rows, and convert data types.
No need for coding: Its visual interface makes data prep easy, even for non-programmers.
Keeps a clear log: Every step is recorded, so changes are easy to trace or undo.
If you regularly work with messy data from different departments or systems, Power Query is the tool that helps you get it all in one place and ready to go.
What Is a Power Pivot? A Practical Tutorial
Power Pivot is an advanced data modeling feature in Excel. Instead of just working with a single flat table, it lets you work with multiple related tables. You can create relationships, use calculated fields, and build powerful pivot tables from huge datasets.
What Power Pivot Does Best:
Handles big data: It can work with millions of rows without slowing down.
Creates relationships: You can link multiple tables without merging them.
Supports DAX formulas: These allow you to create advanced calculations that go beyond standard Excel functions.
Improves reporting: Helps build dynamic dashboards and pivot tables based on complex models.
If you’re building reports that need to pull information from several tables, Power Pivot will save you hours of work and improve the quality of your analysis.
Power Query vs Power Pivot: A Side-by-Side Comparison
Let’s break it down clearly:FeaturePower Query in ExcelPower Pivot TutorialMain Use Preparing and transforming data Modeling data and running advanced calculationsStrength Connecting and cleaning data from sources Creating relationships and custom measuresInterface Step-by-step visual editor Data model view with DAX supportIdeal For Standardizing messy input data Analyzing large structured datasets
So, Power Query is for cleaning and prepping. Power Pivot is for modeling and analyzing. Simple as that.
Using Both Tools Together
You don’t have to choose between them. In fact, combining both tools gives you the best results.
A Typical Workflow:
Start with Power QueryLoad the data, clean it, and apply all your transformations.
Move to Power PivotCreate relationships between the tables, define measures, and build your reports.
This combination is what makes Excel a real powerhouse for data analysis. It’s a workflow many professionals use daily.
When to Use Power Query
Here are situations where Power Query is the better choice:
You need to import data from multiple sources.
You’re dealing with messy or inconsistent data.
You want to automate data cleanup tasks.
You need a repeatable process that updates with fresh data.
If you find yourself repeating the same steps every time you get new data, Power Query can handle all of that with just one click.
When Power Pivot Is the Right Tool
Use Power Pivot when:
Your data is too large for regular Excel to handle efficiently.
You’re working with multiple related tables.
You want to build custom KPIs and metrics.
You need to create a dynamic dashboard with slicers and filters.
Power Pivot is perfect for business analysts who need to dive deep into data and build powerful reports without leaving Excel.
Final Thoughts
Understanding how Power Query in Excel and Power Pivot work, And how they work together can completely change the way you use Excel. They are part of a bigger trend of self-service BI tools, giving more power to users without relying on IT or external software.
Use Power Query to clean and organize your data.
Use Power Pivot to model and analyze it.
Use both tools to build a streamlined, automated workflow that saves time and improves accuracy.
If you’re serious about improving your Excel skills, learning both tools is a smart investment.
0 notes
Text
Reading and Importing Data in SAS: CSV, Excel, and More
In the world of data analytics, efficient data importation is a fundamental skill. SAS (Statistical Analysis System), a powerful platform for data analysis and statistical computing, offers robust tools to read and import data from various formats, including CSV, Excel, and more. Regardless of whether you are a beginner or overseeing analytics at an enterprise level, understanding how to import data into SAS is the initial step towards obtaining valuable insights.
This article breaks down the most common methods of importing data in SAS, along with best practices and real-world applications—offering value to everyone from learners in a Data Analyst Course to experienced professionals refining their workflows.
Why Importing Data Matters in SAS
Before any analysis begins, the data must be accessible. Importing data correctly ensures integrity, compatibility, and efficiency in processing. SAS supports a range of formats, allowing analysts to work with data from different sources seamlessly. The most common among these are CSV and Excel files due to their ubiquity in business and research environments.
Understanding how SAS handles these files can drastically improve productivity, particularly when working with large datasets or performing repetitive tasks in reporting and modelling.
Importing CSV Files into SAS
Comma-Separated Values (CSV) files are lightweight, easy to generate, and commonly used to exchange data. In SAS, importing CSVs is straightforward.
When importing a CSV file, SAS treats each line as an observation and each comma as a delimiter between variables. This format is ideal for users who deal with exported data from databases or web applications.
Best Practices:
Clean your CSV files before importing—ensure no missing headers, extra commas, or encoding issues.
Use descriptive variable names in the first row of the CSV to streamline your SAS workflow.
Always review the imported data to verify that variable types and formats are interpreted correctly.
Professionals undertaking a Data Analyst Course often begin with CSV files due to their simplicity, making this an essential foundational skill.
Importing Excel Files into SAS
Excel files are the go-to format for business users and analysts. They often contain multiple sheets, merged cells, and various data types, which adds complexity to the import process.
SAS provides built-in tools for reading Excel files, including engines like XLSX and the Import Wizard, which are available in SAS Studio or Enterprise Guide. These tools allow users to preview sheets, specify ranges, and even convert date formats during import.
Key Considerations:
Ensure the Excel file is not open during import to avoid access errors.
Use consistent formatting in Excel—SAS may misinterpret mixed data types within a single column.
If your Excel workbook contains multiple sheets, decide whether you need to import one or all of them.
Advanced users and those enrolled in a Data Analytics Course in Mumbai often work with Excel as part of larger data integration pipelines, making mastery of these techniques critical.
Importing Data from Other Sources
Beyond CSV and Excel, SAS supports numerous other data formats, including:
Text files (.txt): Often used for raw data exports or logs.
Database connections: Through SAS/ACCESS, users can connect to databases like Oracle, SQL Server, or MySQL.
JSON and XML: Increasingly used in web-based and API data integrations.
SAS Datasets (.sas7bdat): Native format with optimised performance for large datasets.
Each format comes with its own import nuances, such as specifying delimiters, encoding schemes, or schema mappings. Familiarity with these enhances flexibility in working with diverse data environments.
Tips for Efficient Data Importing
Here are a few practical tips to improve your SAS data importing skills:
Automate repetitive imports using macros or scheduled jobs.
Validate imported data against source files to catch discrepancies early.
Log and document your import steps—especially when working in team environments or preparing data for audits.
Stay updated: SAS frequently updates its procedures and import capabilities to accommodate new formats and security standards.
Learning and Upskilling with SAS
Importing data is just one piece of the SAS puzzle. For aspiring data professionals, structured training offers the advantage of guided learning, hands-on practice, and industry context. A Data Analyst training will typically begin with data handling techniques, setting the stage for more advanced topics like modelling, visualisation, and predictive analytics.
For learners in metro regions, a Data Analytics Course in Mumbai can provide local networking opportunities, expert mentorship, and exposure to real-world projects involving SAS. These programs often include training in data import techniques as part of their curriculum, preparing students for the demands of modern data-driven roles.
Final Thoughts
Reading and importing data into SAS is a vital skill that underpins all subsequent analysis. Whether you're working with CSV files exported from a CRM, Excel spreadsheets from finance teams, or direct connections to enterprise databases, mastering these tasks can significantly enhance your efficiency and accuracy.
By understanding the nuances of each data format and leveraging SAS's powerful import tools, you’ll be better equipped to manage data workflows, ensure data quality, and drive valuable insights. And for those committed to building a career in analytics, a course could be the stepping stone to mastering not just SAS but the entire data science pipeline.
Business name: ExcelR- Data Science, Data Analytics, Business Analytics Course Training Mumbai
Address: 304, 3rd Floor, Pratibha Building. Three Petrol pump, Lal Bahadur Shastri Rd, opposite Manas Tower, Pakhdi, Thane West, Thane, Maharashtra 400602
Phone: 09108238354,
Email: [email protected]
0 notes
Text
Data import and export in R
R is a versatile tool that can handle a wide range of data sources, making it a go-to language for data analysis and statistical computing. Whether you’re working with CSV files, Excel spreadsheets, or databases, R provides powerful functions and packages to import and export data efficiently. In this section, we’ll explore how to import data from various sources and export your results back into different formats.
Importing Data from CSV Files
CSV (Comma-Separated Values) is one of the most common formats for storing and exchanging data. R has built-in functions to read and write CSV files, making it easy to import data for analysis.
Using read.csv():
The read.csv() function is used to read data from a CSV file into a data frame.# Importing a CSV file data <- read.csv("path/to/your/file.csv") # Display the first few rows of the data head(data)
Customizing the Import:
You can customize how the data is imported by using additional arguments such as header, sep, and stringsAsFactors.# Importing a CSV file with custom settings data <- read.csv("path/to/your/file.csv", header = TRUE, sep = ",", stringsAsFactors = FALSE)
header = TRUE: Indicates that the first row contains column names.
sep = ",": Specifies the separator used in the CSV file.
stringsAsFactors = FALSE: Prevents character strings from being converted into factors.
Importing Data from Excel Files
Excel is another widely used format for storing data, especially in business environments. R provides several packages to read and write Excel files, with readxl and openxlsx being two popular options.
Using readxl Package:
The readxl package allows you to read Excel files without needing to install external dependencies.# Install and load the readxl package install.packages("readxl") library(readxl) # Importing an Excel file data <- read_excel("path/to/your/file.xlsx", sheet = 1) # Display the first few rows of the data head(data)
sheet = 1: Specifies which sheet to read from the Excel file.
Using openxlsx Package:
The openxlsx package offers more flexibility, including writing data back to Excel files.# Install and load the openxlsx package install.packages("openxlsx") library(openxlsx) # Importing an Excel file data <- read.xlsx("path/to/your/file.xlsx", sheet = 1) # Display the first few rows of the data head(data)
Importing Data from Databases
R can also connect to various databases, allowing you to import large datasets directly into R. The DBI package is a standard interface for communication between R and databases, and it works with several backend packages like RMySQL, RPostgreSQL, and RSQLite.
Using DBI and RSQLite:
Here’s an example of how to connect to a SQLite database and import data.# Install and load the DBI and RSQLite packages install.packages("DBI") install.packages("RSQLite") library(DBI) library(RSQLite) # Connect to a SQLite database con <- dbConnect(RSQLite::SQLite(), dbname = "path/to/your/database.sqlite") # Importing a table from the database data <- dbGetQuery(con, "SELECT * FROM your_table_name") # Display the first few rows of the data head(data) # Disconnect from the database dbDisconnect(con)
Connecting to Other Databases:
Similar procedures apply when connecting to MySQL, PostgreSQL, or other databases, with the appropriate backend package (RMySQL, RPostgreSQL, etc.).
Importing Data from Other Sources
R supports data import from various other sources such as: JSON: Using the jsonlite package.
XML: Using the XML or xml2 packages.
Web Data: Using the httr or rvest packages to scrape data from websites.
SPSS, SAS, Stata: Using the haven package to import data from statistical software.
Here’s an example of importing JSON data:# Install and load the jsonlite package install.packages("jsonlite") library(jsonlite) # Importing a JSON file data <- fromJSON("path/to/your/file.json") # Display the first few rows of the data head(data)
Exporting Data from R
Once you’ve processed or analyzed your data in R, you may want to export it for reporting, sharing, or further use.
Exporting to CSV:
The write.csv() function allows you to export data frames to a CSV file.# Exporting data to a CSV file write.csv(data, "path/to/save/your/file.csv", row.names = FALSE)
row.names = FALSE: Prevents row names from being written to the file.
Exporting to Excel:
If you used the openxlsx package, you can also write data frames to Excel files.# Exporting data to an Excel file write.xlsx(data, "path/to/save/your/file.xlsx")
Exporting to Databases:
You can use the dbWriteTable() function from the DBI package to export data back into a database.# Connecting to the database con <- dbConnect(RSQLite::SQLite(), dbname = "path/to/your/database.sqlite") # Writing data to a new table in the database dbWriteTable(con, "new_table_name", data) # Disconnecting from the database dbDisconnect(con)
Best Practices for Data Import and Export
Data Validation: Always inspect the first few rows of your imported data using head() to ensure it has been read correctly.
Customizing Imports: Use the various arguments available in the import functions to handle specific file structures or formatting issues.
Keep a Clean Workspace: After importing and exporting data, clean up your workspace by removing temporary objects or closing database connections to prevent memory issues.
Full details available at https://strategicleap.blogspot.com/
0 notes
Text
Ensuring Data Accuracy with Cleaning
Ensuring data accuracy with cleaning is an essential step in data preparation. Here’s a structured approach to mastering this process:
1. Understand the Importance of Data Cleaning
Data cleaning is crucial because inaccurate or inconsistent data leads to faulty analysis and incorrect conclusions. Clean data ensures reliability and robustness in decision-making processes.
2. Common Data Issues
Identify the common issues you might face:
Missing Data: Null or empty values.
Duplicate Records: Repeated entries that skew results.
Inconsistent Formatting: Variations in date formats, currency, or units.
Outliers and Errors: Extreme or invalid values.
Data Type Mismatches: Text where numbers should be or vice versa.
Spelling or Casing Errors: Variations like “John Doe” vs. “john doe.”
Irrelevant Data: Data not needed for the analysis.
3. Tools and Libraries for Data Cleaning
Python: Libraries like pandas, numpy, and pyjanitor.
Excel: Built-in cleaning functions and tools.
SQL: Using TRIM, COALESCE, and other string functions.
Specialized Tools: OpenRefine, Talend, or Power Query.
4. Step-by-Step Process
a. Assess Data Quality
Perform exploratory data analysis (EDA) using summary statistics and visualizations.
Identify missing values, inconsistencies, and outliers.
b. Handle Missing Data
Imputation: Replace with mean, median, mode, or predictive models.
Removal: Drop rows or columns if data is excessive or non-critical.
c. Remove Duplicates
Use functions like drop_duplicates() in pandas to clean redundant entries.
d. Standardize Formatting
Convert all text to lowercase/uppercase for consistency.
Standardize date formats, units, or numerical scales.
e. Validate Data
Check against business rules or constraints (e.g., dates in a reasonable range).
f. Handle Outliers
Remove or adjust values outside an acceptable range.
g. Data Type Corrections
Convert columns to appropriate types (e.g., float, datetime).
5. Automate and Validate
Automation: Use scripts or pipelines to clean data consistently.
Validation: After cleaning, cross-check data against known standards or benchmarks.
6. Continuous Improvement
Keep a record of cleaning steps to ensure reproducibility.
Regularly review processes to adapt to new challenges.
Would you like a Python script or examples using a specific dataset to see these principles in action?
0 notes
Text
From List to Data: A Beginner’s Guide to Data Transformation
In today’s data-driven world, transforming raw information into structured formats is a critical skill. One common task in data processing is converting a list—a simple, unstructured sequence of values—into structured data that can be analyzed, visualized, or stored. A “list” might be a shopping list, a sequence of names, or numbers collected from user inputs. “Data,” in contrast, refers to a structured format such as a table, database, or dataset. The goal of transforming a list to data is to make it usable for insights, automation, or further manipulation. Understanding this process helps beginners make sense of how information is organized in software systems, spreadsheets, or databases. It’s not just a programming task—it’s a foundational part of digital literacy.
Why Converting Lists to Data Matters
Lists are everywhere: in text files, spreadsheets, form submissions, or even copied from emails. But these lists often need structure before they can be used. Structured data can be sorted, filtered, analyzed, or even turned into charts. For example, if you receive a list of customer names and purchases, it’s just raw text until it’s organized into phone number data and columns—where each row is a customer and each column is a data point like name, item, or price. Without this transformation, automation tools, machine learning models, or even basic Excel functions can’t work effectively. Converting lists to structured data enables better decisions, reporting, and scaling of workflows.

Simple Tools for List-to-Data Conversion
You don’t need to be a coder to transform lists into data. Tools like Microsoft Excel, Google Sheets, or Notepad++ make this easy. For example, using the "Text to Columns" feature in Excel, you can split list items into cells. In Google Sheets, functions like SPLIT() and ARRAYFORMULA() help break down and reorganize text. Online tools like CSV converters also turn lists into structured CSV files. These steps make it easier for users to handle raw data without complex scripts. Beginners can start with drag-and-drop interfaces and learn basic data formatting.
Moving Beyond Basics: Automation with Python and Scripts
Once you’re comfortable with basic tools, learning to automate list-to-data conversions with scripting languages like Python is a powerful next step. Python libraries such as pandas make it simple to import a list from a file and convert it into a DataFrame—a table-like data structure. For example, if you have a list stored in a .txt file, Python can read it, parse it using string functions, and format it into rows and columns automatically. This is especially useful when handling large or repetitive data. Automating the process not only saves time but also reduces human error. It opens the door to building entire data pipelines, integrating APIs, or performing advanced analysis.
0 notes

Text
I will convert PDF bank statement to excel sheet. Any bank statement editing USA Canada any country service available
Contact me Whatsapp+8801721997284
Are you tired of manually entering data from your PDF files into Excel? Let me save you time & effort by providing you with accurate and efficient PDF to Excel or CSV or google sheet conversion services.
With my expertise in data entry and my proficiency in using advanced tools such as Adobe Acrobat and Microsoft Excel, I will ensure that every piece of information is accurately extracted from your PDF files & organized into the appropriate Excel columns.
Here's what you can expect from my data entry gig:
Accurate conversion of PDF files to MS Excel or csv file or google spreadsheets
Organized & structured data in Excel columns & rows
Fast delivery of completed project
Data cleaning & formatting for easy analysis & manipulation
100% confidentiality & security of your data
I understand that every project is unique and may require different levels of complexity. Therefore, I offer customized solutions to fit your specific needs. Whether you have a small or large project, I am committed to delivering a high-quality service that meets your expectations.

#bank#bank statement#bank statements#documents#fake documents#graphics designer#outer banks#west bank#documentary#paystub generator#csv files#microsoft#microsoft word#tax returns#viralpost#viral trends#viralfyp#trending
0 notes
Text

Organizing Your Data: Tips for Excel Beginners
Microsoft Excel is a powerful tool for organizing and analyzing data. For beginners, learning the basics of how to organize data in Excel can significantly improve productivity and streamline workflows. Whether you’re managing small personal projects or large datasets at work, knowing how to effectively organize and present data in Excel is essential.
In this article, we’ll walk through some basic yet essential tips for organizing data in Excel that will help you stay organized and efficient. If you’re looking to master Excel, consider joining the Advanced Excel Course at CADL (Chandigarh Academy of Digital Learning), where you’ll gain expert-level skills to unlock Excel’s full potential.
1. Start with Clean Data
Before diving into organizing data, it’s crucial to ensure your data is clean. This means eliminating unnecessary information, correcting spelling mistakes, and ensuring that all your data follows a consistent format.
Key Tips for Cleaning Data:
Remove duplicates: Use Excel’s “Remove Duplicates” feature to avoid redundant entries in your dataset.
Correct formatting: Ensure that dates, numbers, and text fields are formatted consistently across the sheet.
Trim spaces: Use the TRIM() function to remove any extra spaces that may accidentally be included in your data.
Starting with clean data will make it easier to analyze and organize your information without any complications.
2. Use Headers for Better Understanding
Adding headers to your columns is an essential practice when organizing data in Excel. Headers describe what each column represents, making your dataset more readable and easier to navigate. This becomes especially important when working with large spreadsheets, as headers help you keep track of the information in each column.
How to Add Headers:
Simply enter the name of the data field (e.g., “Name,” “Date,” “Amount”) into the first row of each column.
Use bold formatting to make headers stand out from the rest of the data.
Freeze the header row so that it remains visible when scrolling down large datasets. To do this, go to View > Freeze Panes > Freeze Top Row.
3. Apply Filters for Easy Sorting and Searching
Excel’s filtering feature allows you to easily sort and search through data, especially in larger datasets. Filters can help you find specific entries, highlight particular patterns, or categorize data quickly.
How to Apply Filters:
Select the data range that contains headers.
Go to the Data tab and select Filter.
Small dropdown arrows will appear in the header row, which you can use to sort or filter specific entries (e.g., highest to lowest, alphabetical, or by custom criteria).
Using filters allows you to work more efficiently and focus only on the data that matters for your current task.
4. Group Similar Data with Tables
If you’re working with large datasets, converting your data into an Excel Table can be a great way to keep things organized. Tables allow you to group similar data together, and they automatically update formatting and formulas as you add or remove data.
How to Create a Table:
Select your dataset.
Go to the Insert tab and click Table.
Choose whether your table contains headers, and Excel will format the data for you.
Tables not only make your data more visually appealing but also simplify functions like filtering and sorting, as they come with built-in features to handle these tasks.
5. Use Conditional Formatting for Better Visualization
Conditional formatting is an Excel feature that helps you visually organize your data by highlighting cells that meet specific conditions. This is especially useful when dealing with financial data or datasets where trends and outliers need to be easily identified.
How to Apply Conditional Formatting:
Select the range of cells where you want to apply formatting.
Go to the Home tab and click Conditional Formatting.
Choose the formatting rule, such as highlighting cells that contain values above or below a certain threshold.
Conditional formatting allows you to quickly spot trends, make comparisons, or flag potential issues in your data, improving both organization and analysis.
6. Use Excel Formulas for Automation
One of the key features that make Excel such a powerful tool is its vast array of built-in formulas. Learning to use basic formulas can help you automate repetitive tasks, perform calculations quickly, and organize data more efficiently.
Basic Excel Formulas for Beginners:
SUM(): Adds up a range of numbers.
AVERAGE(): Calculates the average of a set of numbers.
COUNT(): Counts the number of entries in a range.
IF(): Performs a conditional calculation based on a specified condition.
Mastering these formulas will not only help you organize your data better but will also save time when performing complex calculations.
7. Organize Data with PivotTables
PivotTables are an excellent tool for summarizing large datasets. They allow you to analyze and group data in meaningful ways, making it easier to spot trends, relationships, and outliers.
How to Create a PivotTable:
Select the data range.
Go to the Insert tab and select PivotTable.
Drag and drop the fields you want to analyze into the appropriate areas, such as Rows, Columns, and Values.
PivotTables are perfect for organizing and analyzing large amounts of data, making them a must-know tool for anyone working with Excel.
8. Save and Organize Your Workbook Efficiently
Lastly, saving and organizing your workbook properly is essential for maintaining data organization. Use appropriate naming conventions, organize different datasets into separate sheets within a workbook, and back up your files regularly to prevent data loss.
Best Practices for Organizing Workbooks:
Use descriptive file names to identify the contents of your workbook.
Create separate sheets for different data categories.
Regularly save your work and maintain backups in cloud storage or an external drive.
Join the Advanced Excel Course at CADL
If you’re ready to take your Excel skills to the next level, consider joining the Advanced Excel Course at CADL (Chandigarh Academy of Digital Learning). This course covers advanced data management techniques, complex formulas, automation with macros, and more, helping you become an Excel expert.
With CADL’s expert instructors and hands-on learning approach, you’ll master:
Advanced functions and formulas.
PivotTables and data analysis techniques.
Data visualization with charts and graphs.
Time-saving tips with Excel automation.
By the end of the course, you’ll be equipped to handle complex data management tasks, streamline your workflow, and become more efficient in your everyday tasks.
Conclusion
Organizing data in Excel is a crucial skill for anyone working with data, whether you’re a beginner or an experienced user. By cleaning your data, applying filters, creating tables, and using features like conditional formatting and PivotTables, you can stay organized and make better data-driven decisions.
If you want to enhance your Excel skills and boost your productivity, don’t miss out on the Advanced Excel Course at CADL, where you’ll gain the knowledge and confidence to work with Excel like a pro.
0 notes
Text
Mastering Microsoft Excel: Unlock Your Productivity

Why Learn Microsoft Excel?
You may have heard of Microsoft Excel, but have you really tapped into its full potential? For beginners, it’s easy to view Excel as a simple tool for inputting data, but its capabilities go far beyond that. In fact, Microsoft Excel is an industry-standard tool for data analysis, financial forecasting, and even automation through its built-in functions and macros. Here’s why you should consider learning it today:
Data Management and Organization: Excel allows you to organize vast amounts of data in an easy-to-navigate format. You can create tables, sort information, and find trends with a few clicks.
Advanced Calculations: Whether you're handling personal finances or business reports, Microsoft Excel helps you perform complex calculations through formulas and functions. From basic sums to advanced pivot tables, Excel simplifies your data processes.
Improved Decision Making: Through visual representation like charts, graphs, and conditional formatting, Excel helps you present data in a more digestible format, aiding in better decision-making.
Trending Features of Microsoft Excel
In recent years, Microsoft Excel has evolved to include advanced tools that many users still aren't aware of. If you’re looking to stay ahead in your field, mastering these features can set you apart:
Power Query: This tool allows you to extract and transform data from multiple sources, making it easier to analyze large datasets without manual intervention.
Pivot Tables and Pivot Charts: These are vital for summarizing large data sets quickly. They let you visualize complex data, identify trends, and make informed decisions.
VLOOKUP and XLOOKUP Functions: As your dataset grows, finding specific information can be time-consuming. The XLOOKUP function, an upgrade of VLOOKUP, allows you to search for specific data across rows and columns more efficiently.
Macros and Automation: Automate repetitive tasks in Excel using macros, allowing you to perform complex tasks with a single click.
By learning these trending features, you can significantly boost your productivity and streamline your workflow.
Microsoft Excel for Business and Finance
For business professionals, Microsoft Excel is a lifeline. From accountants to data analysts, Excel is indispensable in industries where data-driven decisions are key. Excel's ability to handle financial modeling, budgeting, and scenario planning makes it one of the most valuable skills in today’s job market.
In finance, Excel is used for building financial models, running forecasts, and performing financial analysis. The What-If Analysis tool is particularly popular for projecting business outcomes based on different scenarios. Excel also has integrated add-ins like Solver, which can be used for optimizing resource allocation and other business-critical decisions.
How Microsoft Excel Helps in Data Visualization
Another standout feature of Microsoft Excel is its ability to convert raw data into meaningful insights through data visualization. Tools like Conditional Formatting, Charts, and Slicers allow users to create interactive dashboards. These features are particularly beneficial for professionals who need to present data to stakeholders in a clear and actionable way.
Creating graphs and pie charts in Excel takes seconds, and the visual representation can make your data far more accessible, helping both you and your team make informed decisions quickly. If you’re into data science or business intelligence, tools like Power BI (which integrates with Excel) are indispensable.
Excel’s Relevance in Job Markets
Mastering Microsoft Excel doesn’t just make you more efficient—it also boosts your employability. Job markets worldwide are increasingly favoring candidates with strong Excel skills. From entry-level administrative roles to senior financial analysts, Excel is often a required skill listed in job descriptions. By learning how to leverage its more advanced features, you can become a more competitive job candidate.
If you're in the finance, accounting, or business development fields, Excel skills are non-negotiable. These industries demand a high degree of accuracy and data management, and Microsoft Excel helps professionals maintain that standard.
Popular Uses of Microsoft Excel in Day-to-Day Tasks
Budgeting and Financial Planning: Whether personal or business-related, Excel simplifies the budgeting process. Create templates to track your expenses, income, and financial goals.
Project Management: Excel helps teams track project timelines, milestones, and deliverables. You can create a Gantt Chart using Excel, which allows for better project visualization.
Inventory Management: Small and large businesses use Excel to manage inventory. With just a few formulas, you can create a dynamic sheet that adjusts stock levels automatically when you update sales or purchases.
Customer Data Management: Keep track of client information, purchase history, and engagement in one organized document using Excel.
Key Tips to Enhance Your Microsoft Excel Skills
Want to make the most of your learning journey with Microsoft Excel? Here are some quick tips:
Practice Regularly: The best way to master Excel is through hands-on practice. Download sample datasets and try applying different functions, such as SUMIF, INDEX MATCH, and VLOOKUP.
Learn Keyboard Shortcuts: Keyboard shortcuts like Ctrl + C for copying or Ctrl + Z for undoing a mistake can save you time and make you more efficient.
Join Online Excel Communities: There are numerous forums, such as Reddit and StackOverflow, where Excel users discuss tips, tricks, and solutions to complex problems.
Take Online Courses: Platforms like Udemy offer comprehensive Microsoft Excel courses that guide you from beginner to advanced levels. These courses cover a range of Excel topics, including data analysis, pivot tables, and Excel automation through VBA (Visual Basic for Applications).
Conclusion: Why Microsoft Excel Is the Tool You Need
Whether you're managing data, performing financial forecasts, or simply trying to organize your personal tasks more efficiently, Microsoft Excel is the tool for the job. Its versatility makes it invaluable in various industries, and mastering it opens doors to new career opportunities. From small business owners to corporate executives, Excel is the productivity booster that can take your skills to the next level.
Are you ready to master Microsoft Excel? Start your journey today by exploring the advanced features that will give you a competitive edge in today’s data-driven world.
0 notes
Text
10 MOST USEFUL EXCEL TIPS

What is Microsoft Excel?
Excel is more than a brand everyone knows: it is powerful data visualization and analysis software, which uses spreadsheets to store, organize, and track data sets with formulas and functions..
Where Excel is used?
Microsoft Excel is the most widely used software by businesses.
Excel is used by Students, Faculties , Industry person , marketers .
Almost Excel user does not know enough about Excel.
So, TCCI has tried to give some tips to the Excel user.
Following Tips for Beginners:
Use Cntrl + R
To do Copy & Paste data both at a time.
How to separate data from given text?
Use Left Formula to extract character/text from left side easily.
for example , "mili shah" is given text and want to separate mili then use =left("mili shah",4), mili will
Will be separated in new cell.
How to separate data from given text?
Use Right Formula to extract character/text from right side easily.
for example , "mili shah" is given text and want to separate shah then use =right("mili shah",4), shah
Will be separated in new cell.
Use alt + 7 / alt+ 8/alt+9 to insert Bullets in Cell.
Use Series: To enter date in series enter first date in cell, then drag that cell until last date . You
can use this for weekdays and month also.
6.Use series: To enter number in order, enter first 2 numbers , select them and drag + sign until last
number.
7.How to remove blank rows?
Select all data, press cntl+G, select special ,choose blank , press cntl -(minus),choose entire
row, all blank rows will remove.
How to convert number to word in Excel?
- Use =NumToWord(cellreference) ,you will get result instant.
Add Multiple Rows
Probably one of the most frequently carried out activities in spreadsheeting. Ctrl Shift + is the shortcut, but
actually it takes longer than just right-clicking on the row numbers on the left of the Excel display. So Right
Click is our recommendation. And if you want to add more than one, select as many rows or columns as you'd
like to add and then Right Click and add.
Auto fit column and rows:
Select all of the data then press alt+ H+ O+ I then alt + alt + H + O + A
To learn more Excel in detail Join TCCI and grow your knowledge.
TCCI Computer classes provide the best training in all computer courses online and offline through different learning methods/media located in Bopal Ahmedabad and ISCON Ambli Road in Ahmedabad.
For More Information:
Call us @ +91 98256 18292
Visit us @ http://tccicomputercoaching.com/
#TCCI computer coaching institute#best computer classes near me#best computer class in Bopal Ahmedabad#good computer course near me#basic computer course near me
0 notes
Text
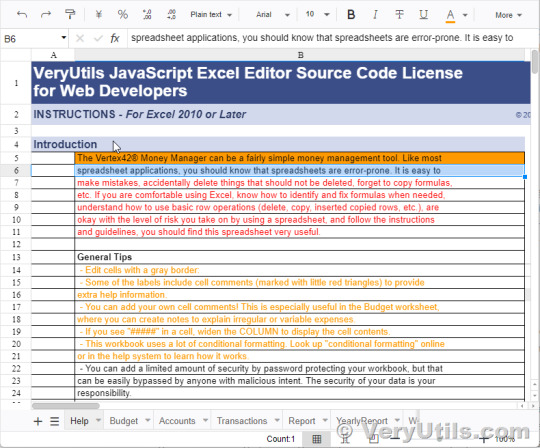
VeryUtils JavaScript Excel Editor Source Code License for Web Developers
VeryUtils JavaScript Excel Editor Source Code License for Web Developers.
✅ JavaScript Spreadsheet: A Comprehensive, Flexible Excel Editor The VeryUtils JavaScript Spreadsheet is a powerful and versatile JavaScript Excel Editor, designed to provide web developers with seamless data analysis and visualization capabilities, akin to those found in Microsoft Excel. This feature-rich tool ensures compatibility with Microsoft Excel file formats, delivering a highly intuitive user interface that simplifies complex data management tasks.
✅ Overview The VeryUtils JavaScript Spreadsheet is a robust control for organizing and analyzing data in a tabular format. It offers all the essential Excel features, including data binding, selection, editing, formatting, resizing, sorting, and both importing and exporting Excel documents. Whether you're building a simple data entry form or a complex data analysis tool, this JavaScript Spreadsheet makes it easy to deliver a high-performance, user-friendly experience.
✅ Why Choose the VeryUtils JavaScript Spreadsheet? High Performance: Optimized for handling large datasets, the JavaScript Spreadsheet is designed to load massive amounts of data efficiently. With row and column virtualization, users can view and interact with data on demand, ensuring smooth performance even with extensive datasets.
Seamless Data Binding: The JavaScript Spreadsheet supports seamless data binding with various local and remote data sources such as JSON, OData, WCF, and RESTful web services. This flexibility is made possible through the integrated data manager, allowing developers to connect and display data effortlessly.
Hassle-Free Formatting: Formatting cells and numbers in the JavaScript Spreadsheet is straightforward, with support for conditional formatting to highlight specific data ranges based on custom conditions. This feature enhances data readability and analysis, making it easier to identify trends and outliers.
Transform Data into Charts: The built-in chart feature allows users to convert spreadsheet data into visually appealing charts, providing an intuitive way to understand and present datasets.
Wide Range of Built-In Formulas: The JavaScript Spreadsheet comes with a comprehensive library of formulas, including cross-sheet references. The built-in calculation engine ensures accurate and efficient formula computations, making it easy to perform complex calculations within your application.
Customizable Themes: With a variety of built-in themes such as Fluent, Tailwind CSS, Material, and Fabric, the JavaScript Spreadsheet offers a modern and attractive design. Developers can further customize these themes using the online Theme Studio tool to match their application's look and feel.
Globalization and Localization: The JavaScript Spreadsheet supports globalization and localization, allowing users to format dates, currency, and numbers according to their locale. This feature ensures that your application can cater to a global audience.
✅ Interactive Features Clipboard Operations: Just like in Microsoft Excel, the JavaScript Spreadsheet supports cut, copy, and paste operations. Users can choose to paste values or formulas with or without formatting in a new range, enhancing the ease of data manipulation.
Undo and Redo: The undo and redo feature allows users to revert or reapply changes within the spreadsheet. Developers can customize the limit of these operations to suit the application's needs.
Context Menu: A context menu appears when a cell, row header, column header, or sheet tab is right-clicked, improving user interaction and making the JavaScript Spreadsheet more intuitive to use.
Cell Comments (Notes): The component provides options to add, edit, and delete cell comments, making it easier to annotate and collaborate on data within the spreadsheet.
Resize and Autofit: The resize and autofit features help users adjust row heights and column widths, ensuring that data is displayed neatly and efficiently.
Smooth Scrolling: Even with large datasets, the JavaScript Spreadsheet offers a smooth scrolling experience, enhancing usability and ensuring that users can navigate through their data effortlessly.
✅ Open and Save Capabilities Excel and CSV Import: The JavaScript Spreadsheet supports importing Excel documents (.xlsx, .xls) and CSV files, ensuring data accuracy, styles, and formats are preserved during the import process.
Excel and CSV Export: Users can easily export data from the JavaScript Spreadsheet to Excel or CSV formats, maintaining data accuracy, styles, and formats, making it easy to share and analyze data outside the application.
✅ Accessibility Keyboard Navigation: The JavaScript Spreadsheet ensures that every cell is accessible via keyboard commands, supporting major features like selection, clipboard, and editing. This keyboard accessibility is crucial for creating highly accessible applications.
Screen Reader Support: With complete WAI-ARIA accessibility support, the JavaScript Spreadsheet offers high-contrast visuals and valid UI descriptions, ensuring that visually impaired users can access the spreadsheet using assistive technologies like screen readers.
Right-to-Left (RTL) Support: The right-to-left rendering option enhances the user experience and accessibility for RTL languages, allowing developers to cater to a broader audience.
✅ Additional Features Touch-Friendly and Responsive: The JavaScript Spreadsheet is optimized for touch gestures, enabling users to swipe through sheets on mobile devices. Its responsive design ensures a consistent user experience across mobile phones, tablets, and desktop devices.
Developer-Friendly APIs: The Spreadsheet's rich set of client-side APIs allows developers to customize the UI and control its behavior according to user requirements, making it a highly adaptable component.
Print Functionality: The JavaScript Spreadsheet includes printing capabilities, allowing users to print single or multiple sheets directly from the application, providing a convenient way to produce hard copies of data.
The VeryUtils JavaScript Excel Editor is an all-in-one solution for web developers looking to implement comprehensive spreadsheet functionality in their applications. With its high performance, extensive feature set, and developer-friendly tools, it is the ideal choice for building powerful, data-driven web applications.
0 notes